Setting up NAT networking
In NAT (Network Address Translation) networking, a virtual machine does not have its own IP address on the external network. Instead, a separate private network is set up on the host system and the virtual machine gets its IP address on this private network from the virtual DHCP server. A VM configured for NAT networking uses a different IP address from a different IP subnet to the one in use on the physical network.
The virtual machine and the host system share a single network identity that is not visible on the external network. When the virtual machine sends a request to access a network resource, it appears to the network resource as if the request is coming from the host system. Virtual machines can reach the outside network and can communicate with other hosts on the LAN.
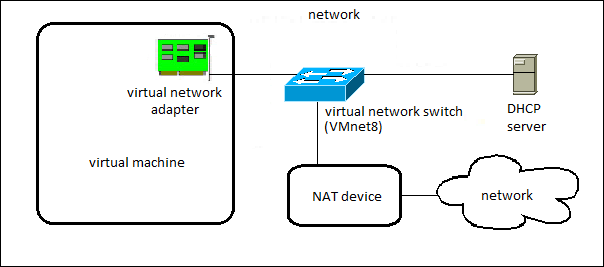
In the figure below you can see an example NAT configuration:
A NAT network (VMnet8) is set up for you when you install Player. The host system has a virtual network adapter on the NAT network that enables the host system and virtual machines to communicate. The NAT device passes network data between virtual machines and the external network, identifies incoming data packets intended for each virtual machine, and sends them to the appropriate destination.
Configure NAT networking for an existing virtual machine
Here is how you can configure NAT networking for an existing virtual machine in Player:
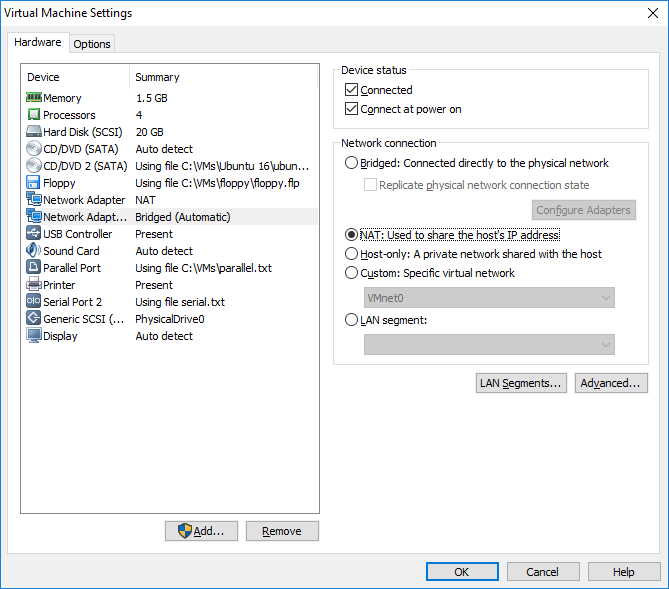
1. Select the virtual machine from the library and go to Player > Manage > Virtual Machine Settings.
2. On the Hardware tab, select the network adapter you would like to modify. Under Network connection, select NAT: Used to share the host’s IP address:
3. Click OK to save the changes.
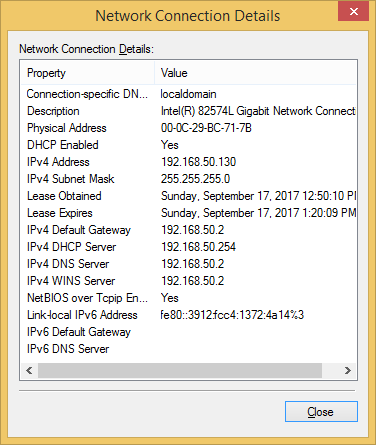
If I change the network adapter type in my Windows 8.1 VM back to NAT, the IP address and other paramters of the adapter will change. Notice that the network adapter no longer gets its DHCP information from the DHCP server on the local network – the virtual DHCP server provides all the parameters instead:


