Enabling a shared folder for a virtual machine
You can enable shared folders for a specific virtual machine. Here are the steps:
1. Choose the virtual machine and select Player > Manage > Virtual Machine Settings.
2. Go to the Options tab and select the Shared Folders option:
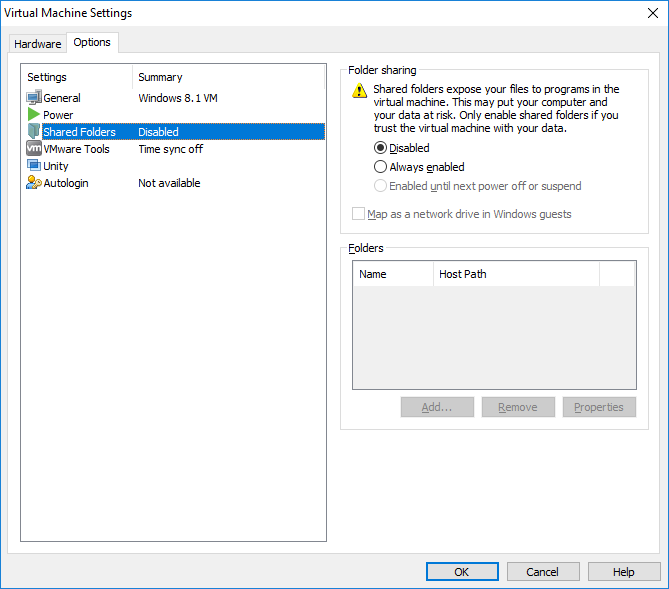
3. Under Folder sharing, choose a sharing option. Besides the Disabled option, two other options are available:
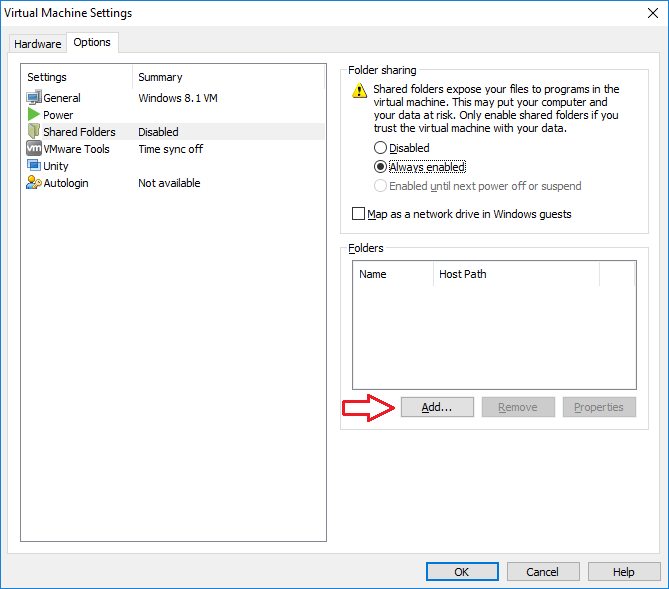
- Always enabled – keeps folder sharing enabled, even when the virtual machine is shut down, suspended, or powered off. Use this option if you want the files on the shared folder to be always accessible.
- Enabled until next power off or suspend – enables folder sharing temporarily, until the virtual machine is shut down, suspended, or powered off. Note that if the guest operating system is restarted, shared folders will remain enabled. This option is grayed out in the picture above because the VM is currently not running.
4. (Optional) You can also map the drive to the Shared Folders directory that contains all shared folders. To do that, select the Map as a network drive in Windows guests option. This option is described in more detail in the next section.
5. Click Add to add a share folder:
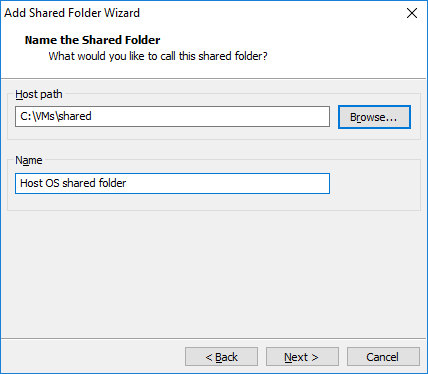
6. The Add Shared Folder Wizard opens. Click Next to continue.
7. Type the path on the host system to the directory you want to share and specify the name under which the folder will appear inside the virtual machine:
8. Select the shared folder options:
- Enable this share – enables the shared folder. Deselect this option when you want to disable the shared folder without deleting it from the virtual machine configuration.
- Read-only – makes the shared folder read-only. The virtual machine users can view and copy files from the shared folder, but they cannot add, change, or remove files.
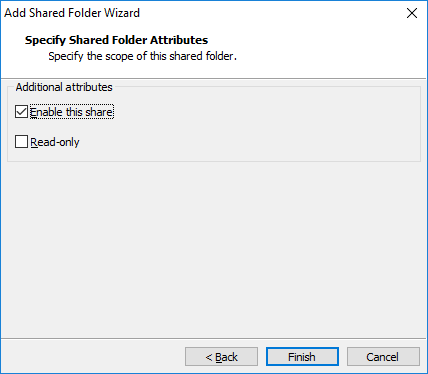
9. Click Finish to finish adding the shared folder.