vCenter Server and Active Directory
You can configure vCenter Server to use the Microsoft Active Directory directory service for authentication purposes. Here is how it can be done:
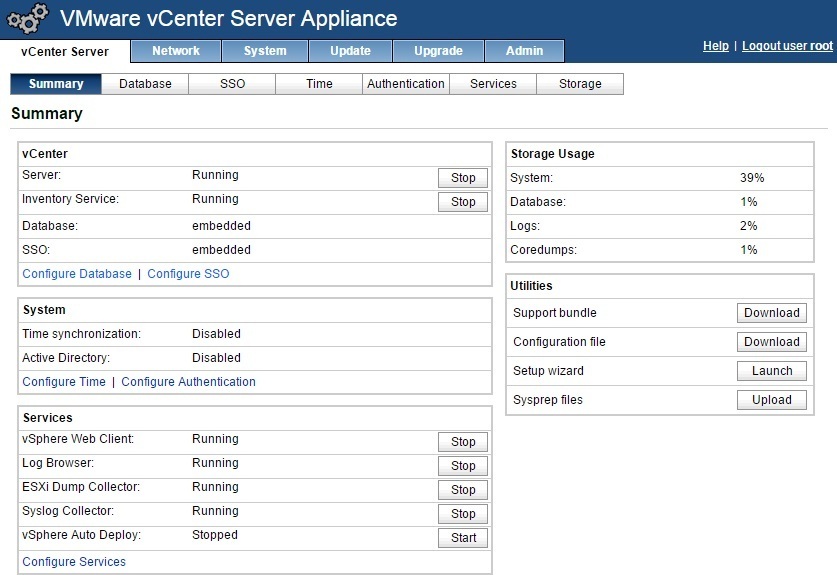
1. First you need to configure vCenter Server Appliance to use directory services. Browse to your vCenter Server management interface at http://vcenter_server_appliance_fqdn:5480 and log in using the root username and password:
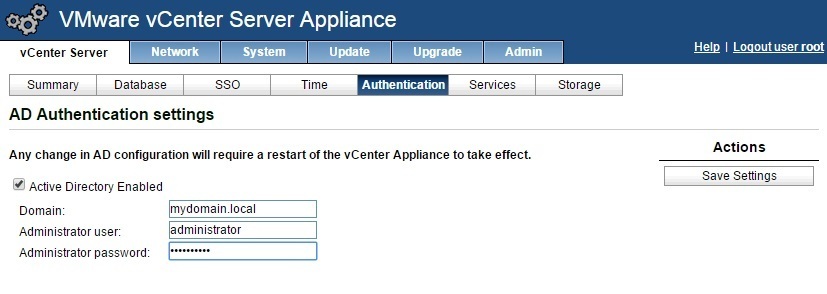
2. On the vCenter Server tab, click Authentication. Check the Active Directory Enabled check box and type the domain name and domain administrator user name and password:
3. Now you need to reboot your vCenter Server. Click on the System tab and click Reboot:
Now you need to add Active Directory as an identity source. Here are the steps:
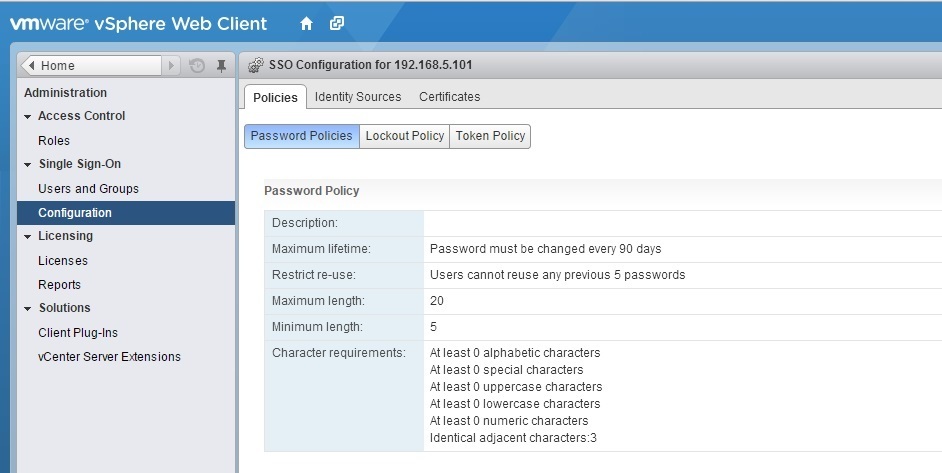
1. Log in to vCenter Server at https://[WEB_CLIENT_FQDN]:9443/vsphere-client. In the navigation bar on the left, click Administration. Under Single Sign-On, click Configuration:
4. Click Identity Sources:
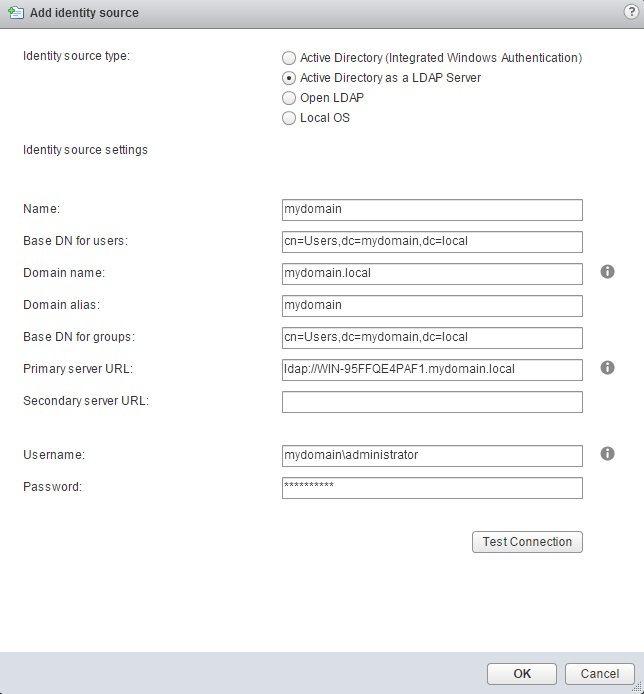
5. Click on the Add Identity source icon (the green plus sign) to add a new identity source. You will need to provide the following information:
Identity source type – select Active Directory as a LDAP server.
Name – type the domain name.
Base DN for users – type the Base DN for users. This parameter describes where to load users. If you’re using a default Active Directory setup, all user are located in the Users folder under your domain. Our domain is mydomain.local, so in LDAP form, that’s cn=Users, dc=mydomain, dc=local.
Domain Name – type the FQDN.
Domain alias – type the domain name.
Base DN for groups – type the Base DN for groups. This parameter describes where to load groups. In our case, the groups are located inside the Users folder.
Primary server URL – type the URL of your domain controller. Precede the URL with ldap://.
Secondary server URL – type the URL of your secondary domain controller, if you have one.
Username – type the domain administrator username.
Password – type the domain administrator password.
7. Click Test Connection. If your parameters are correct, you should get the following message:
8. Click OK to close the dialog box.
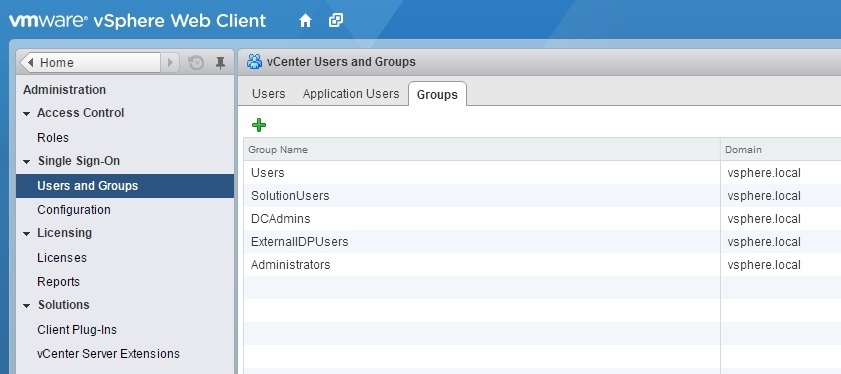
9. Under Single Sign-On, select Users and Groups and click the Groups tab:
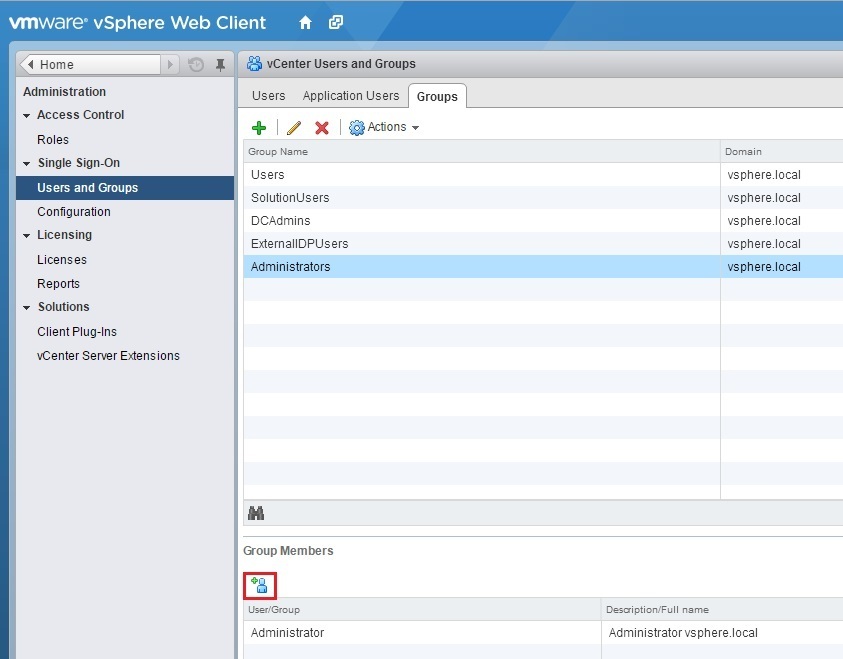
10. Under Group Name, select Administrators and click the Add member icon on the bottom of the screen:
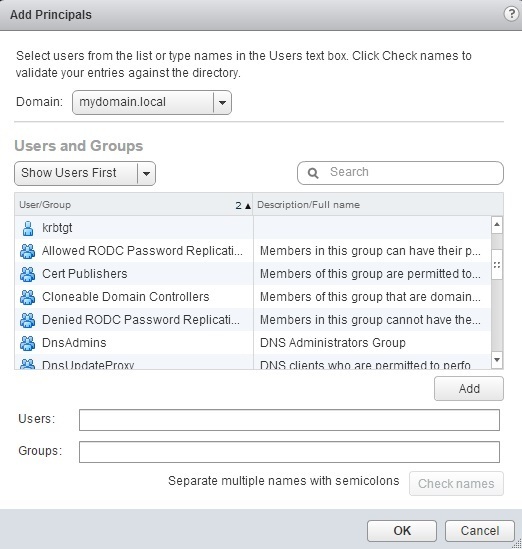
11. Select your AD domain:
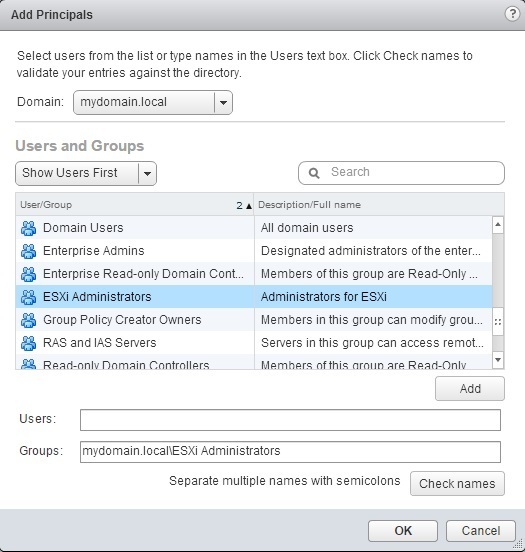
12. Select the user or the group you wish to add to Administrators and click Add:
You can now log in to the vSphere Web client using a domain account:


