Customize guest OS
When cloning a virtual machine or deploying it from a template, you need to provide vCenter Server with the information necessary to give the VM its own unique identity, such as the IP address, passwords, computer name, and license settings. This prevents conflicts that occur when VMs with identical settings are deployed, for example with the same hostname or IP address.
With customization specification, you can provide all information only once and then apply it as needed when cloning a VM or deploying it from a template. Note that the guest OS that is being customized must have VMware Tools installed.
Here are the steps to create a customization specification using vSphere Web Client:
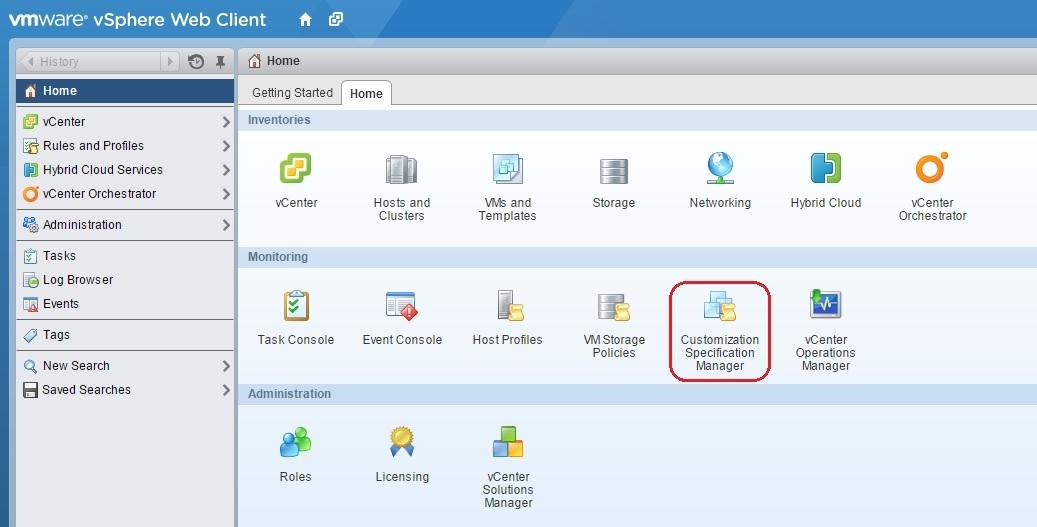
1. Under Monitoring, click the Customization Specification Manager icon:
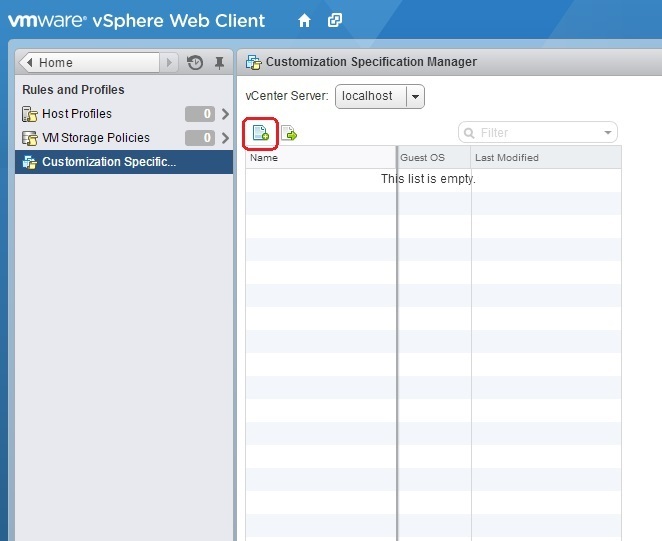
2. Click the Create a new specification icon:
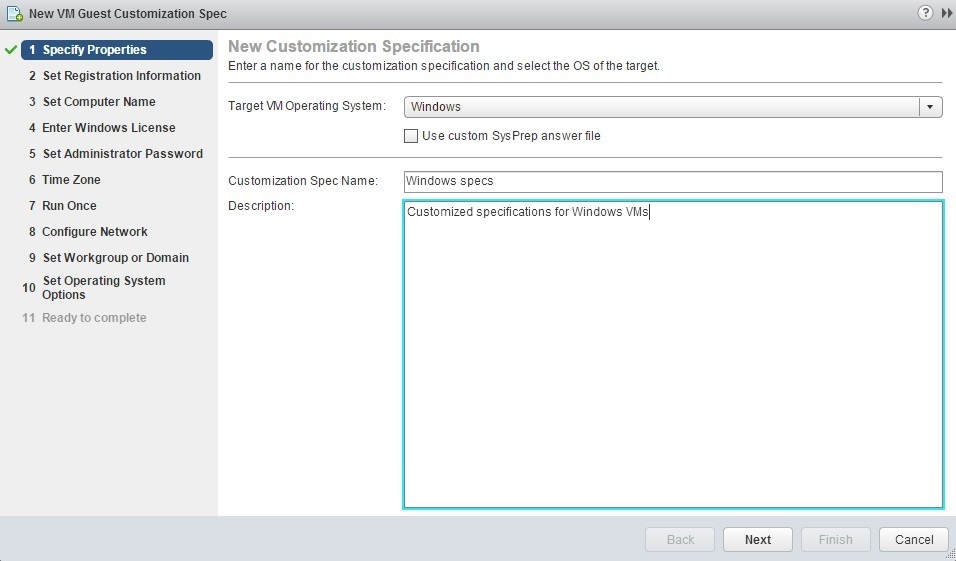
3. The New VM Guest Customization Spec wizard opens. Select the Target VM Operating System and type the name and description of the new specification:
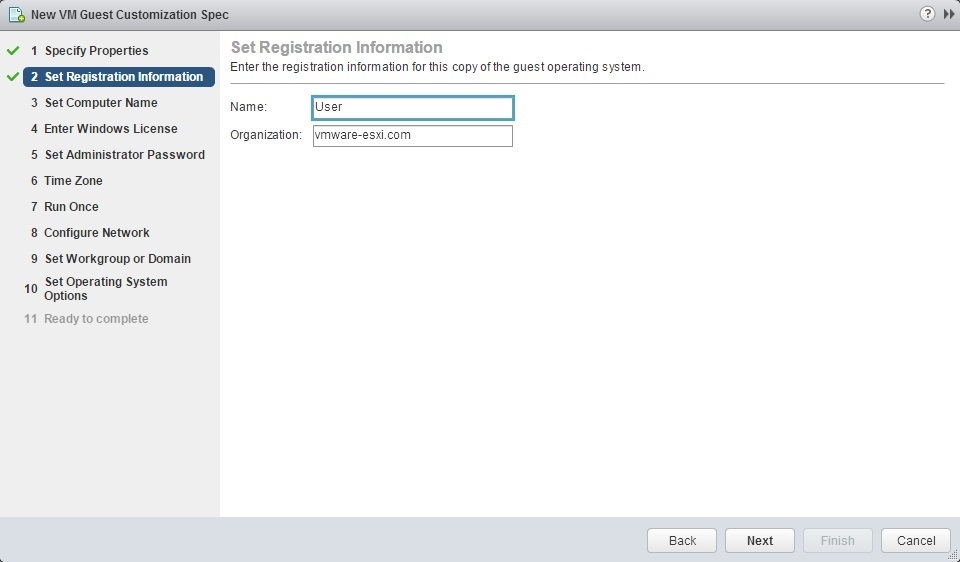
4. Enter registration information and click Next:
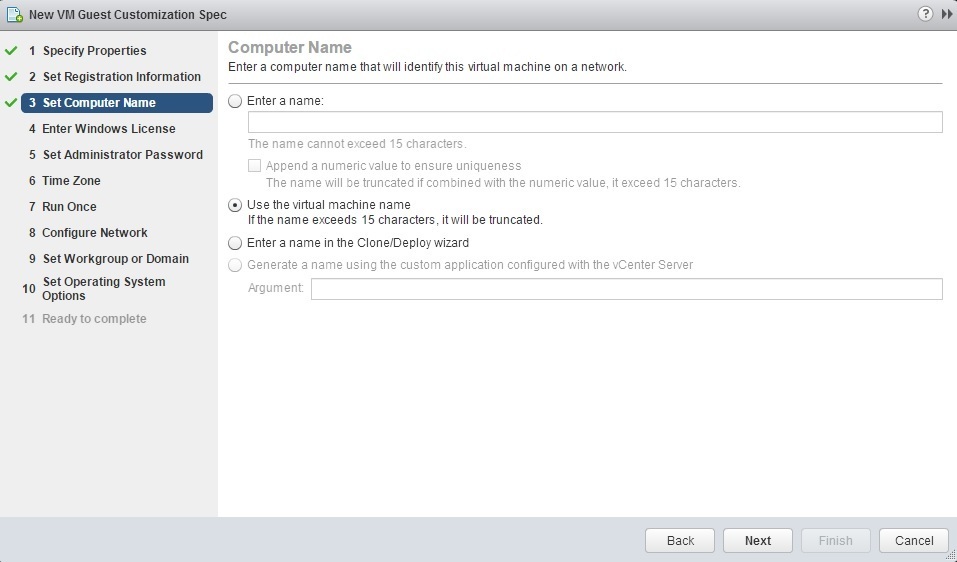
5. Enter the computer name. We’ve selected the Use the virtual machine name option to keep the guest OS computer name matched up with the VM name:
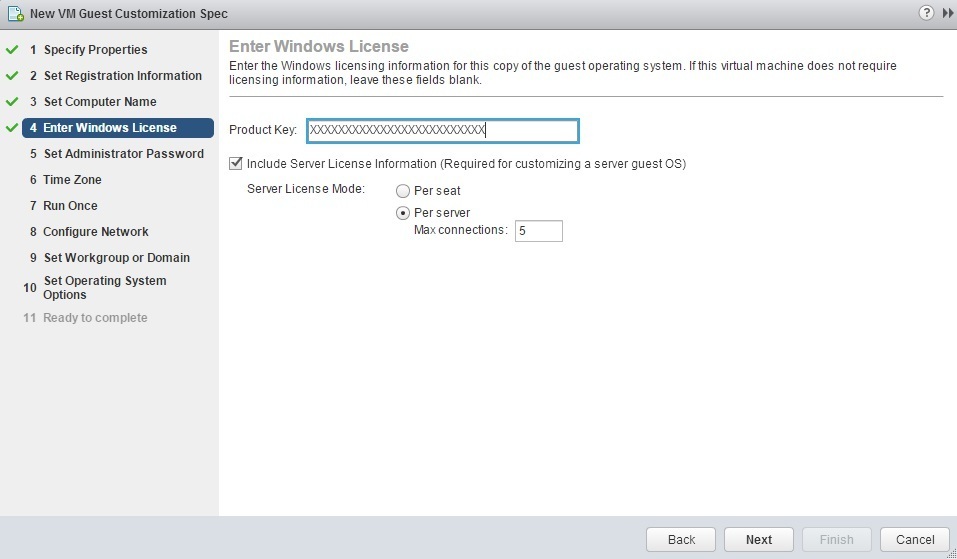
6. Enter the license information and click Next:
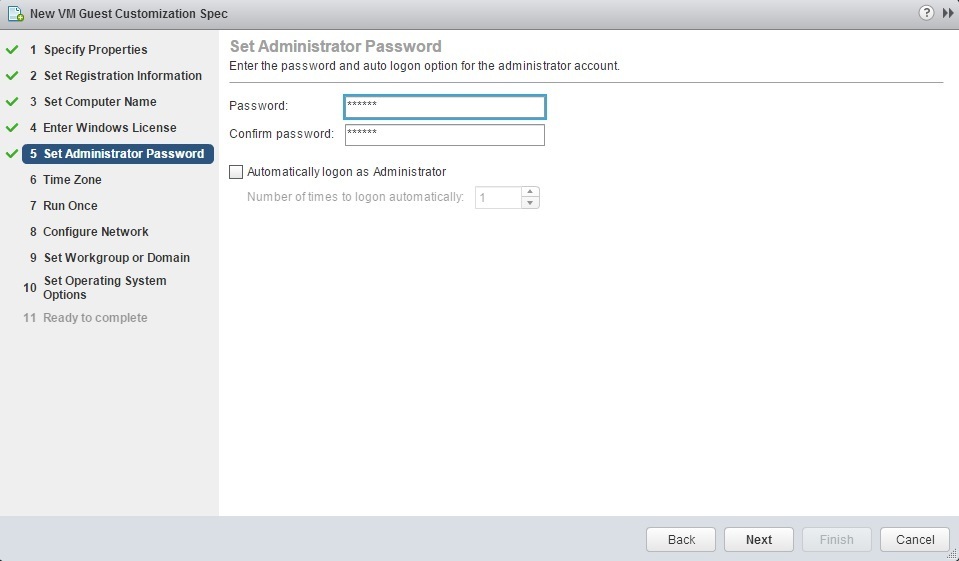
7. Set the administrator password:
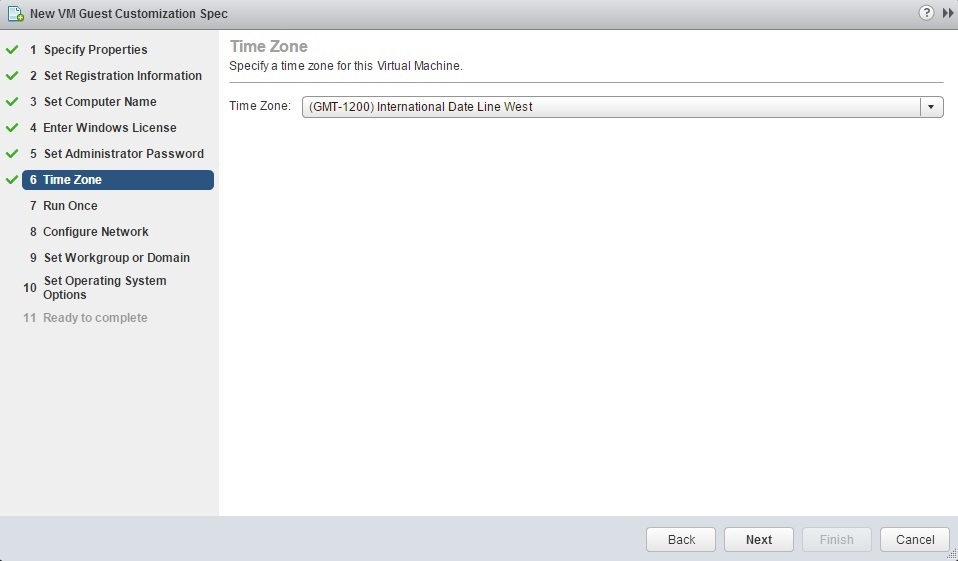
8. Select the timezone:
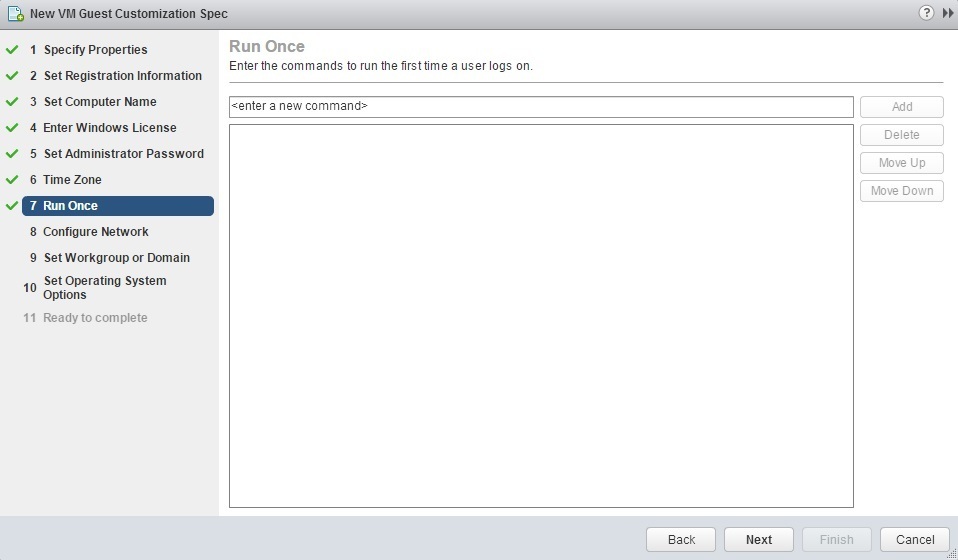
9. If you have any commands you would like to run the first time a user logs on, supply them here:
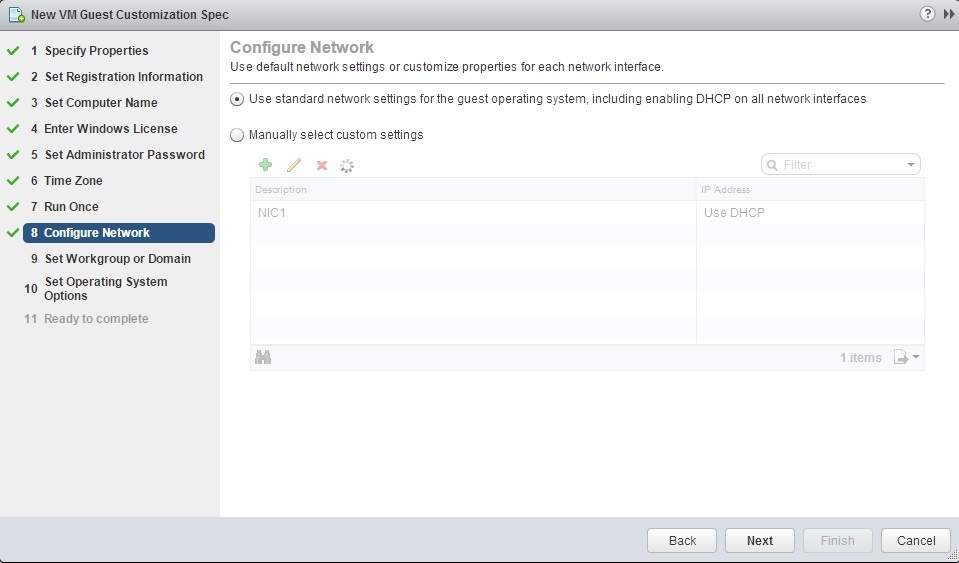
10. Choose the network settings:
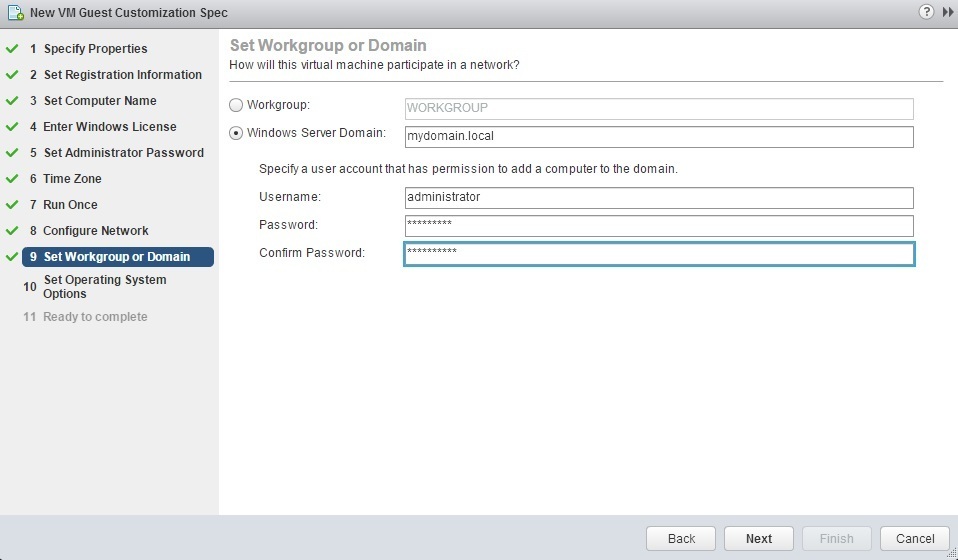
11. Select whether you want to join a workgroup or a domain:
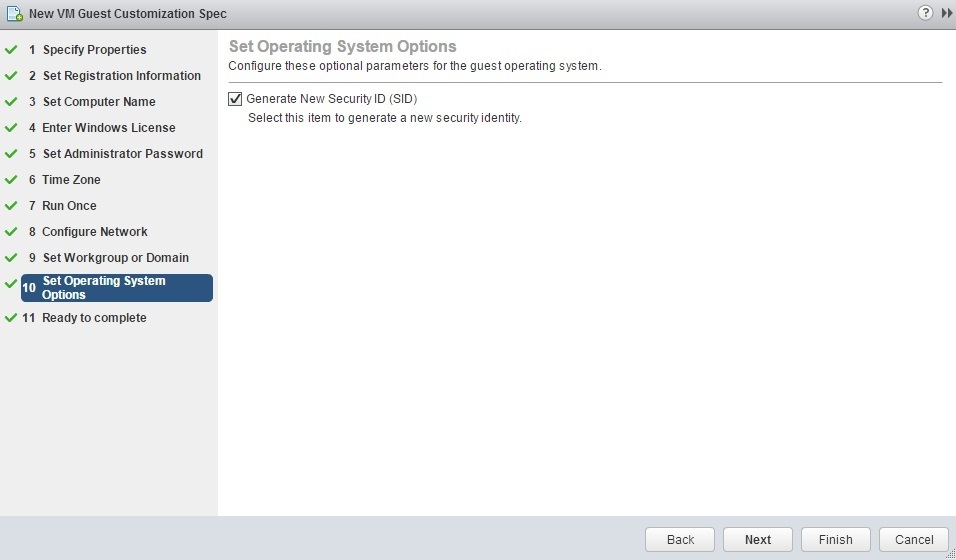
12. Select whether you would like to generate a new SID:
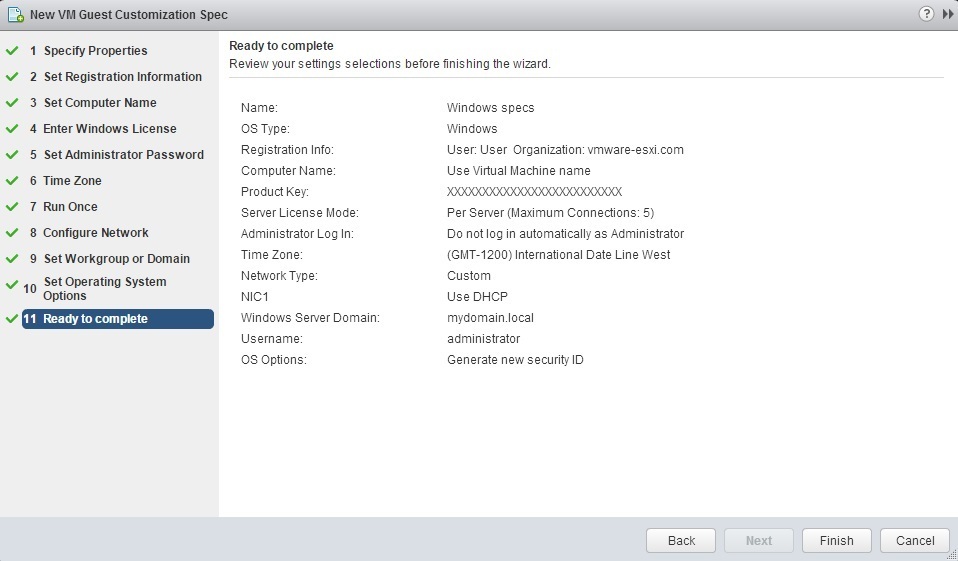
13. Click Finish to end the wizard:
During cloning or deployment, you can select the customization specification you’ve just created to apply to the new VM.


