Add router to Cisco Configuration Professional (CCP)
Before you start using CCP, make sure that the following requirements are met:
- the router you would like to manage should be turned on.
- the router should be enabled to support HTTP or HTTPS. The authentication for HTTP or HTTPS should be configured to use the local database on the router.
- a user with privilege level 15 should be created on the router.
- the router’s IP address should be reachable from your workstation.
Here is an example configuration of the items listed above:
R1(config)#ip http server
R1(config)#ip http secure-server
R1(config)#username administrator privilege 15 secret cisco
R1(config)#ip http authentication local
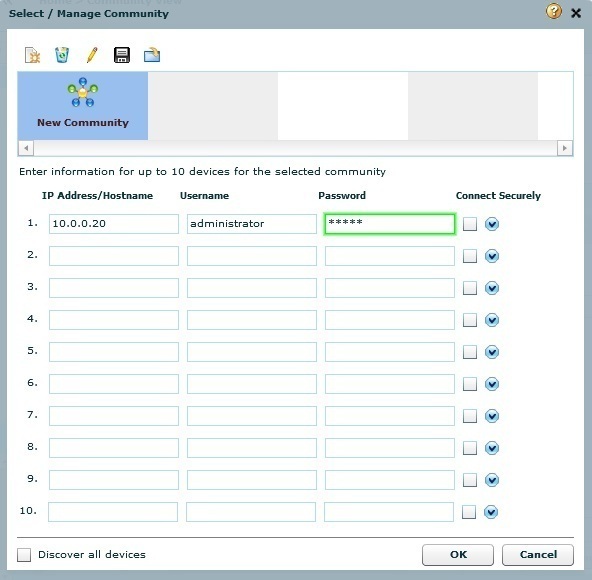
The first time you start CCP, the Select/Manage Community window will prompt you to add a router you would like to manage to the community. A community is simply a group of routers with something in common – the geographic location, for example. A single community can contain up to 10 devices. To add the router you would like to manage, enter its IP address and the credentials you’ve created in the previous step. Enable the Discover all devices option to let CCP discover all devices in the community and click OK:
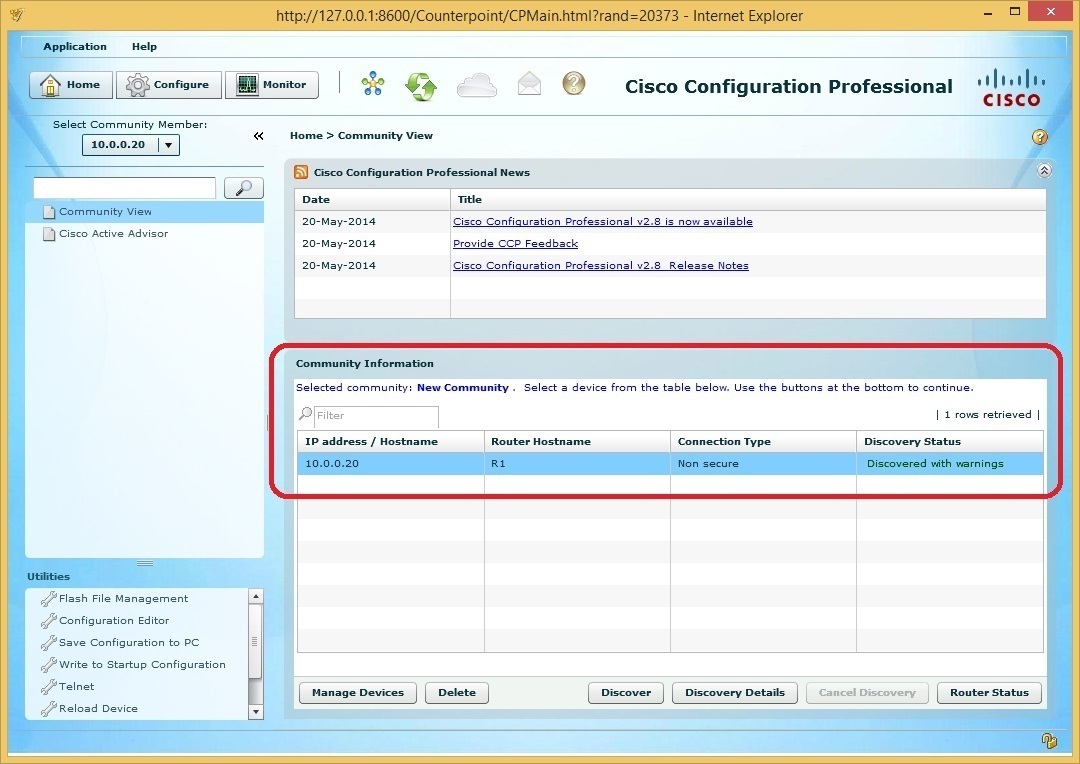
After you’ve added the router to the community, its info should be displayed under Community Information:


