Configure VTP
With VTP, it is possible to make configuration changes centrally on one or more switches and have those changes automatically advertised to all the other switches in the same VTP domain. In a typical LAN, some switches are configured as VTP servers and other switches are configured as VTP clients. A VLAN created on a VTP server switch is automatically advertised to all switches inside the same VTP domain.
To exchange VTP messages, the following requirements must be met:
- a switch has to be configured as either a VTP server or VTP client.
- VTP domain name has to be the same on both switches.
- VTP versions have to match.
- if present, VTP domain password has to be the same.
- the link between the switches has to be configured as a trunk link.
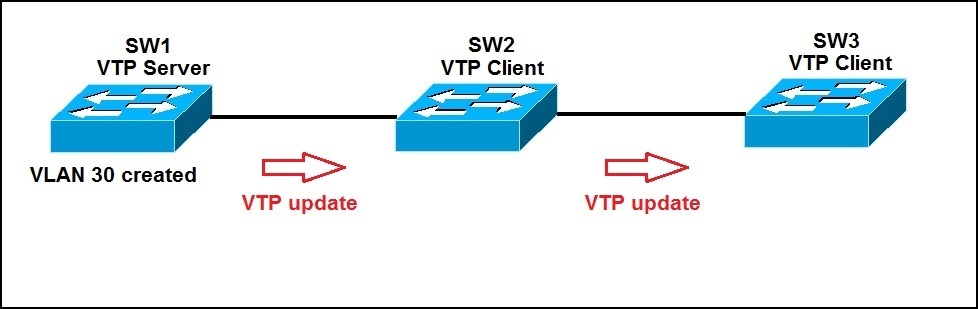
Consider the following example network:
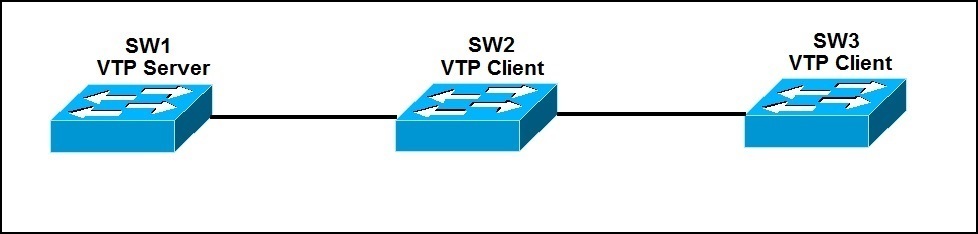
We have a network of three switches connected via trunk links. On SW1, we will configure the VTP domain name using the vtp domain NAME command and the VTP password using the vtp password PASSWORD commands:

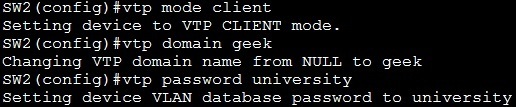
Now we need to configure SW2 and SW3 as VTP clients. We can do it using the following set of commands:
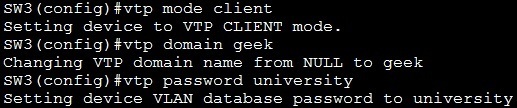
The configuration on SW3 looks similar:
Now, when we create a new VLAN (VLAN 30) on SW1, the VTP update should be sent to SW2 and SW3. The new VLAN should be created automatically on SW2 and SW3:
On SW1, we will create a new VLAN:
![]()
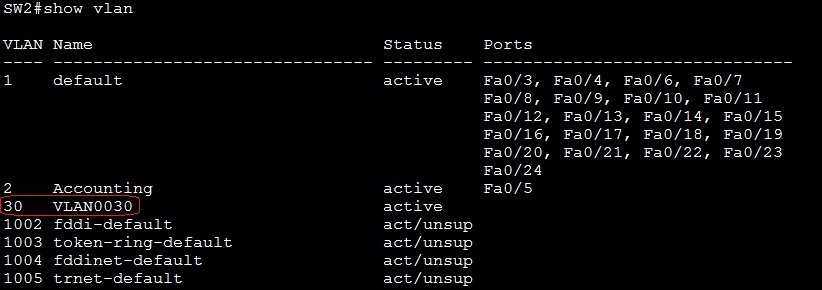
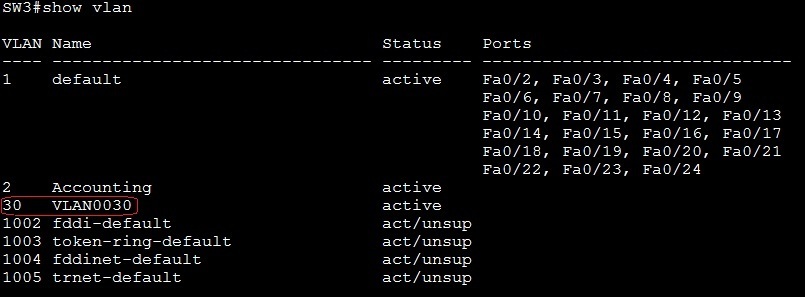
SW2 and SW3 will create the VLAN 30 automatically. We can use the show vlan command on both switches to verify this:
SW2:
SW3:
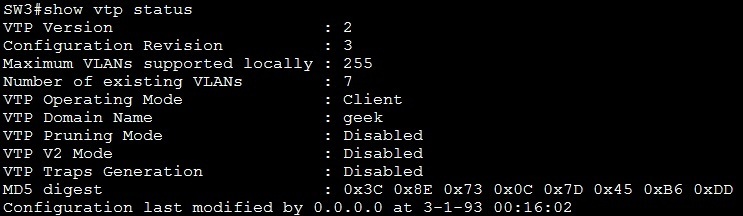
To display the VTP configuration information, you can use the show vtp status command: